Virtualbox Home Lab Setup With Active Directory Configuration
Summary:
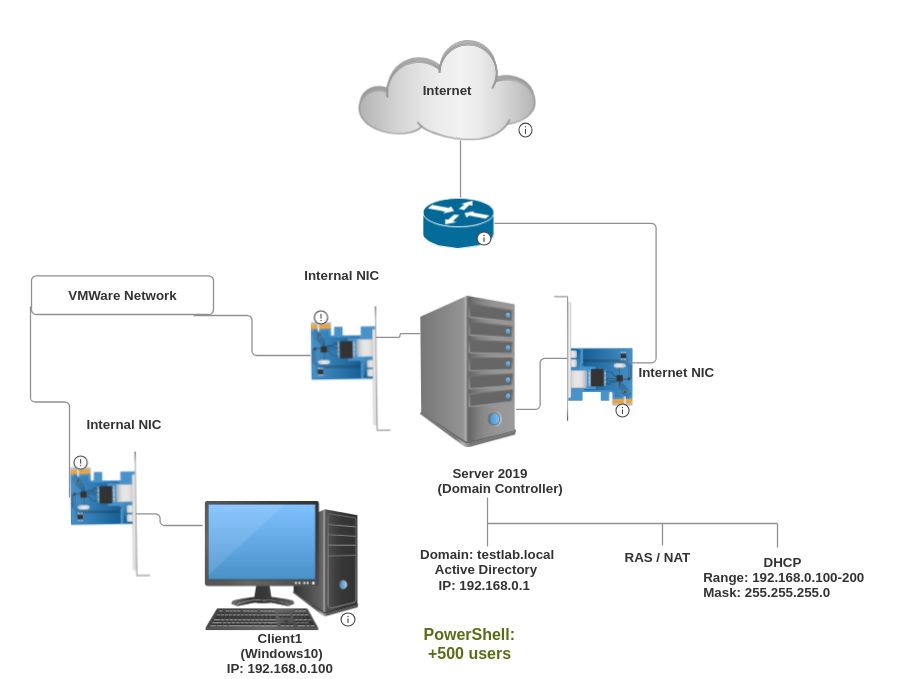
For this project, I set up a home lab using VirtualBox to run Active Directory, configure a DHCP server, and automate user creation with PowerShell. It’s a practical way to dig into networking concepts while working hands-on with real-world tools in a lab environment.
Highlights:
🖥️ Set up Active Directory with a DHCP server.
📄 Automated user creation in Active Directory using PowerShell.
🛠️ Built a Windows 10 client virtual machine.
🌐 Connected all virtual machines to an internal network.
📶 Verified network connectivity and configurations.
🔑 Joined the Windows 10 client to the domain.
🚀 Used the lab to build up networking and IT skills.
Key Insights:
🏗️ Home Lab Setup: Building this lab with Active Directory gives you real-world experience in a controlled environment, simulating a corporate network to practice IT skills.
🔄 DHCP Configuration: Configuring DHCP ensures dynamic IP assignment, which is important when machines are constantly connecting and disconnecting.
📊 User Management: Automating user creation with PowerShell saves time and shows the value of scripting—key when managing larger networks.
💻 Client Integration: Setting up and joining a Windows 10 machine to the domain shows how devices integrate into a network, an essential skill for IT pros.
🔗 Network Connectivity: Troubleshooting and verifying network connectivity between virtual machines is key to making sure everything runs smoothly.
🚪 Domain Authentication: Logging into the client machine with domain credentials reinforces the importance of authentication and security.
📚 Continuous Learning: This project keeps me learning, pushing me further into real-world IT and networking scenarios.
Part 1: Installing Virtualbox with Windows 10 and Server 2019 Setup
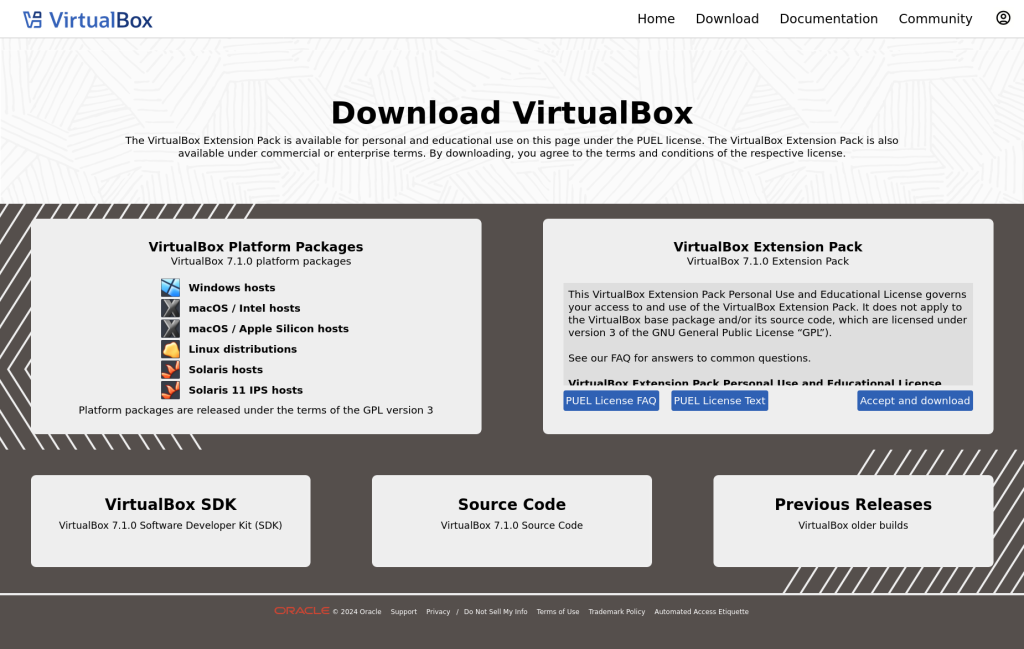
Let's start by visiting the official Virtualbox download page at https://www.virtualbox.org/wiki/Downloads . Select the version that matches your host OS.
– Follow this up by downloading the VirtualBox Extension Pack also located on the download page.
– To verify the extension is installed, open VirtualBox and go to File > Preferences > Extension
Next let's download the 64-bit Windows 10 ISO at https://www.microsoft.com/en-us/software-download/windows10ISO .
Follow this link https://www.microsoft.com/en-us/evalcenter/download-windows-server-2019 to download Windows Server 2019 to use in our virtual lab as our domain controller.
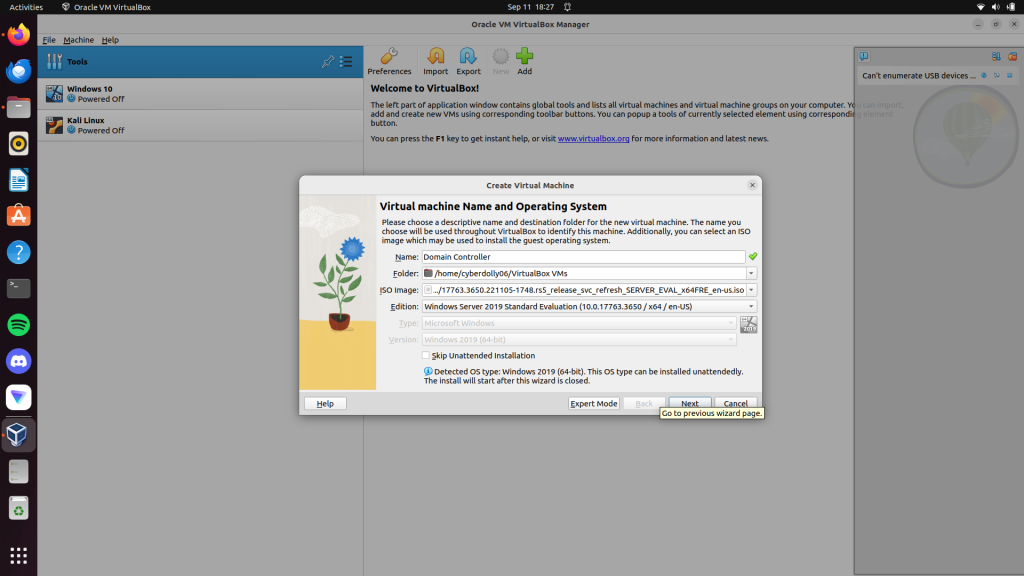
Now head back and open up VirtualBox and click New to create a virtual machine for Windows Server 2019. Set the following parameters:
– Name: Domain Controller (Can also leave as Default ‘Windows Server 2019’)
– ISO Image: Select the ISO file that you downloaded
– Type: Microsoft Windows
– Version: Windows 2019 (64-bit)
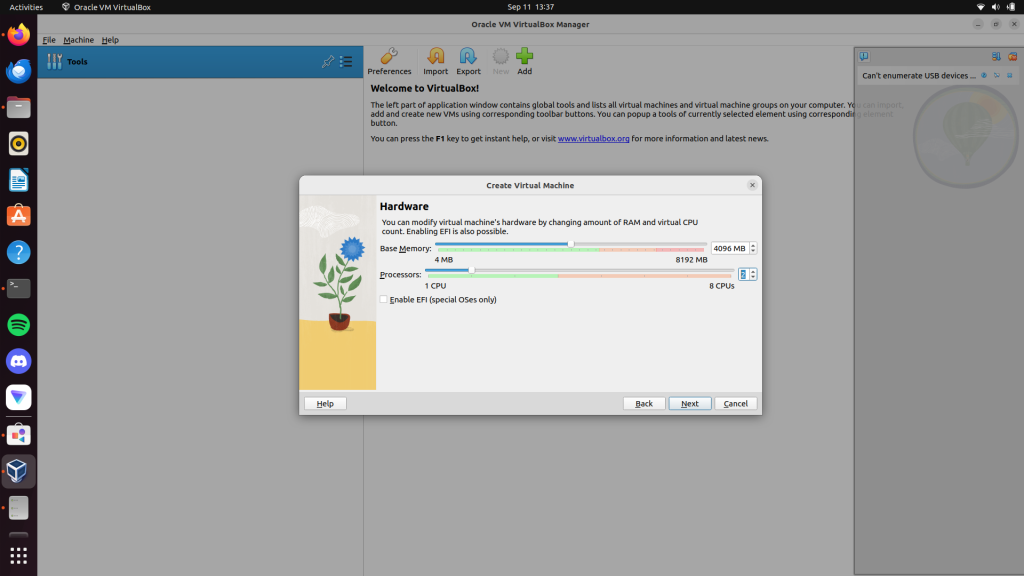
– Memory: At least 2048 MB (2 GB) of RAM
– Hard Disk: Create a virtual hard disk with at least 40 GB of space.
Once you’ve set these, follow the prompts to attach the Windows Server 2019 ISO file and proceed with the setup.
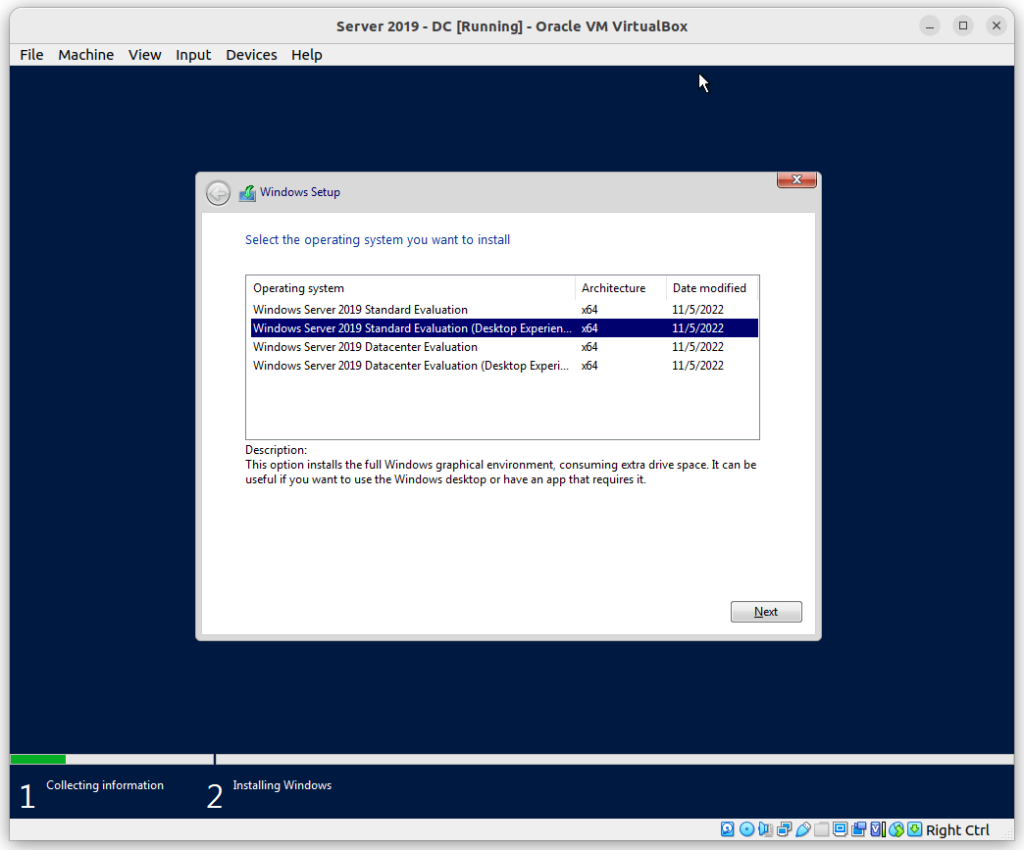
After creating the virtual machine, start it up and follow the installation wizard to install Windows Server 2019. During the setup, be sure to choose the “Desktop Experience” option. Finish the installation process.
– Choose Custom Install when prompted
– Finish the installation.
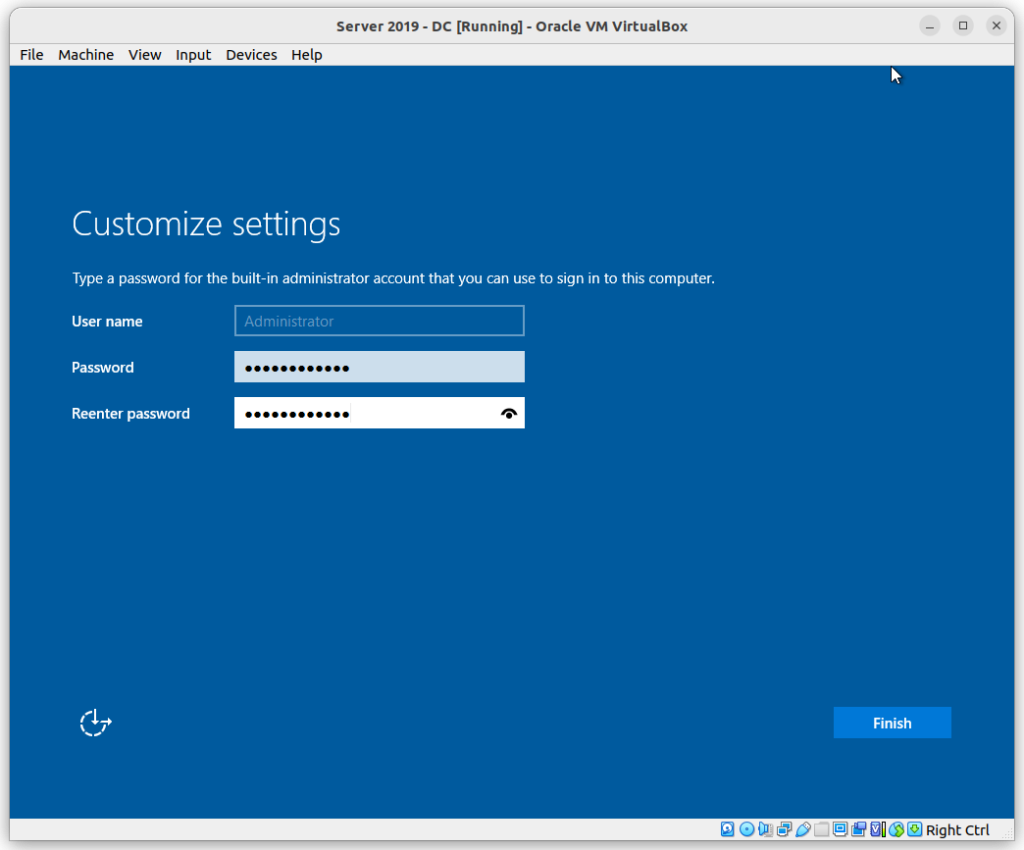
Create an admin password for the server.
Once the server finishes booting let’s turn on Guest Additions for a better user experience.
– Go to Devices > Insert Guest Additions CD Image.
– Open File Explorer > This PC > Guest Additions CD
– Run the AMD64 installer for 64-bit systems.
– Reboot the server virtual machine.
Let’s go ahead and configure the network settings for our server
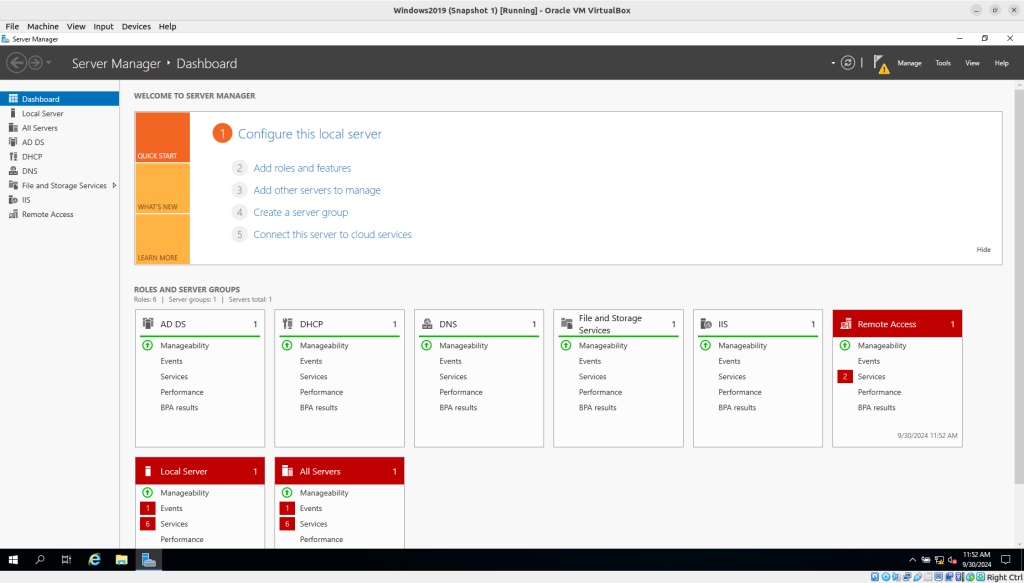
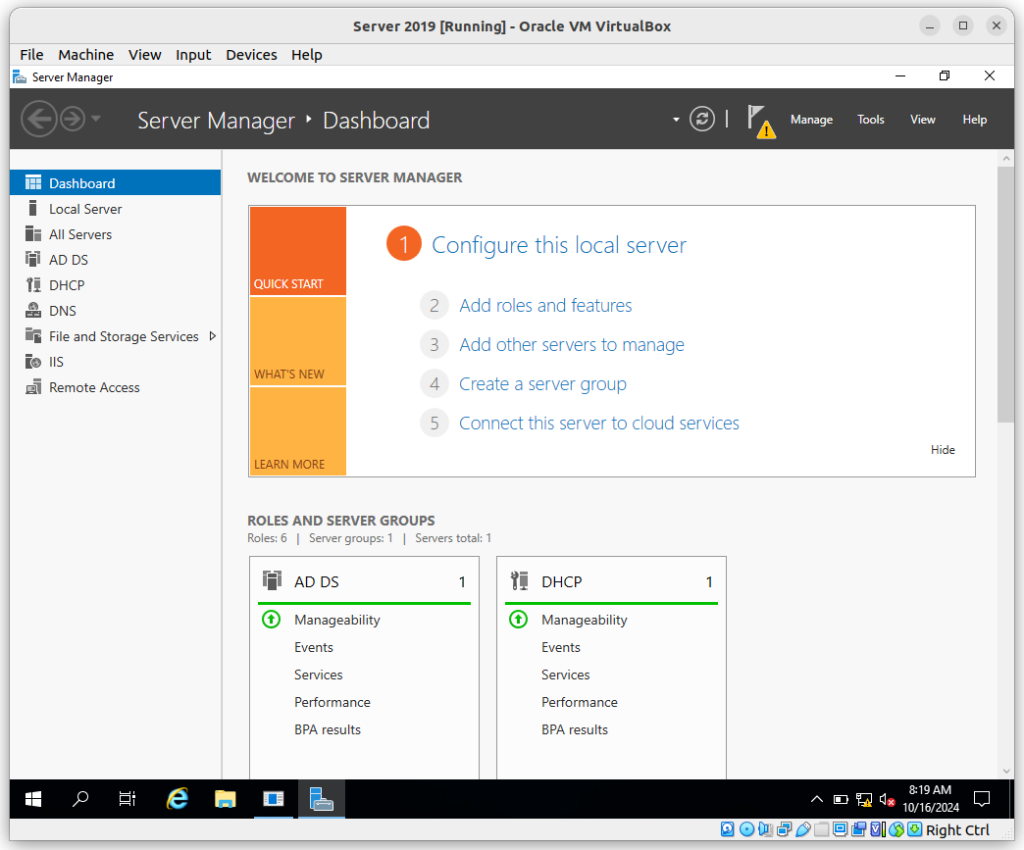
Log into Windows Server 2019: Start your virtual machine, log in using the local administrator account, and open Server Manager (it usually opens automatically upon login).
– Click the network icon in the taskbar.
– Select Change Adapter Options.
– Identify the two adapters one being connected to the internet and the other being internal.
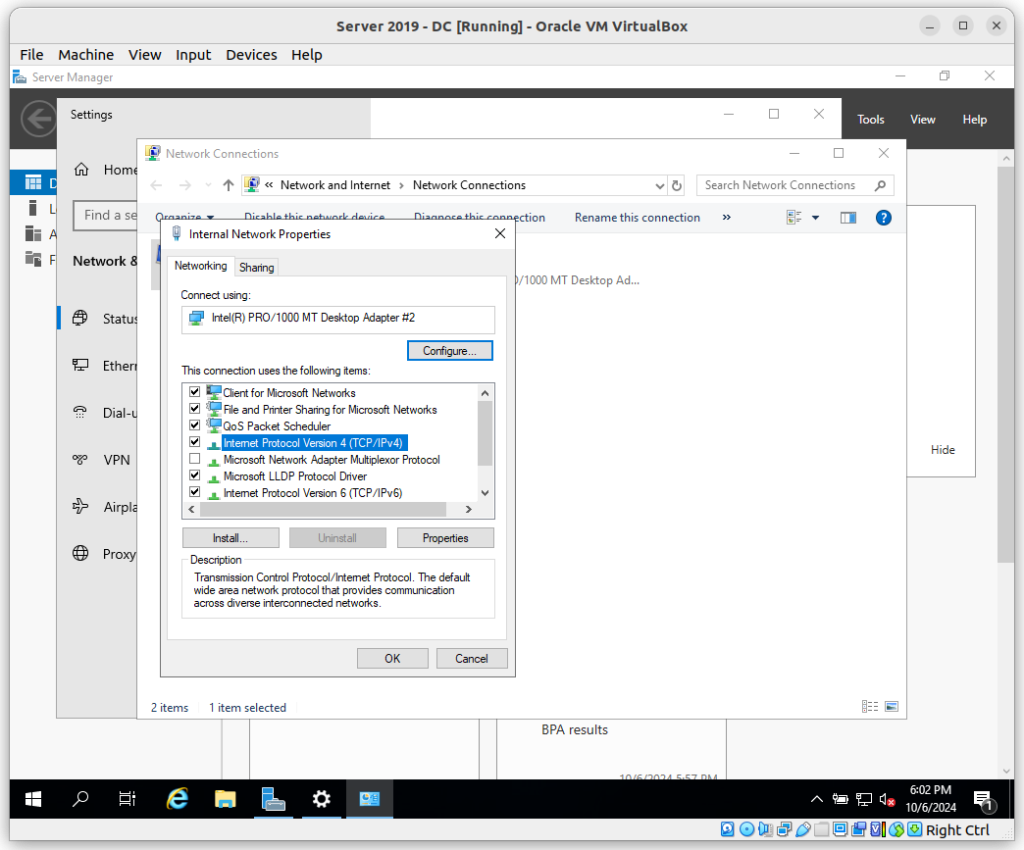
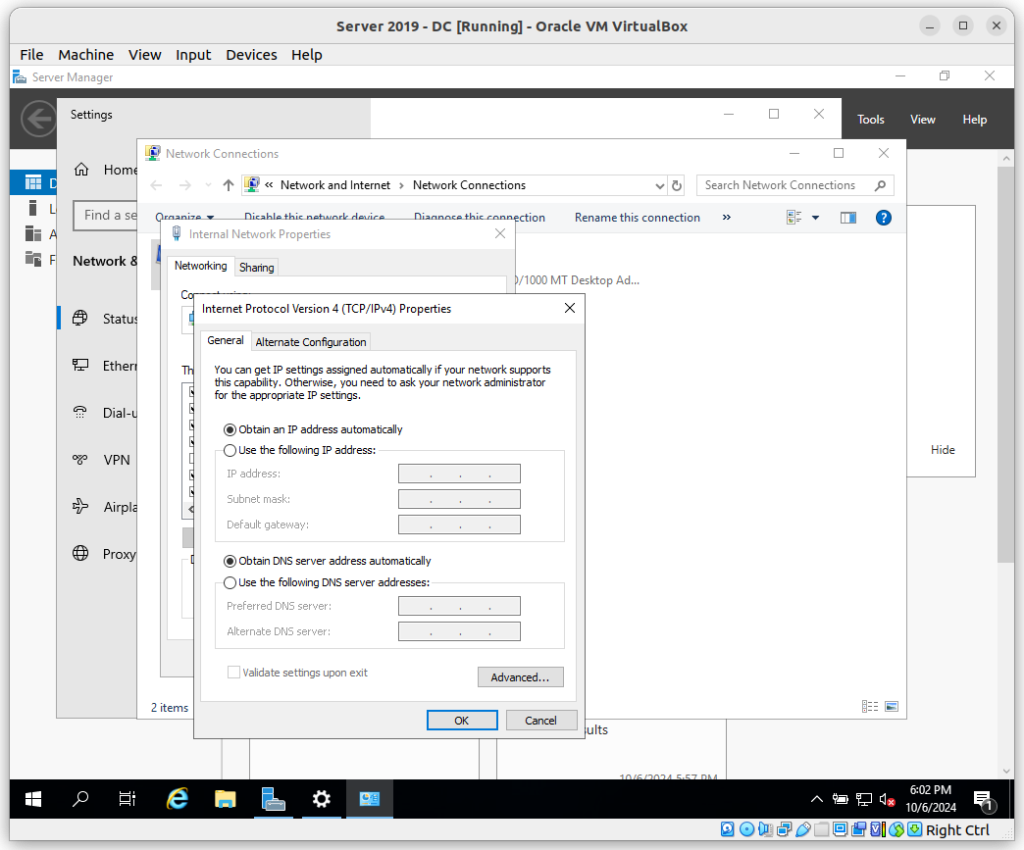
-Set a static IP for the internal adapter:
– Right-click the Internal adapter, go to Properties, and open IPv4.
– For this lab we are going to use the following:
IP: 172.16.0.1
Subnet Mask: 255.255.255.0
Leave the default gateway blank.
– Set DNS to 127.0.0.1 to loopback.
By completing this step, you’ve set up an isolated internal network that allows your virtual machines to communicate securely, without affecting or relying on your physical network.
Part 2: Configuring the Domain Controller & Building a Corporate Network
Log into Windows Server 2019: Start your virtual machine, log in using the local administrator account, and open Server Manager (it usually opens automatically upon login).
– We are going to start by installing Active Directory Domain Services (AD DS).
– Active Directory is going to allow us to manage users, computers, and policies across the network.
Add Active Directory Domain Services (AD DS):
– In Server Manager click Add Roles and Features from the dashboard.
– In Server Manager click Add Roles and Features from the dashboard.
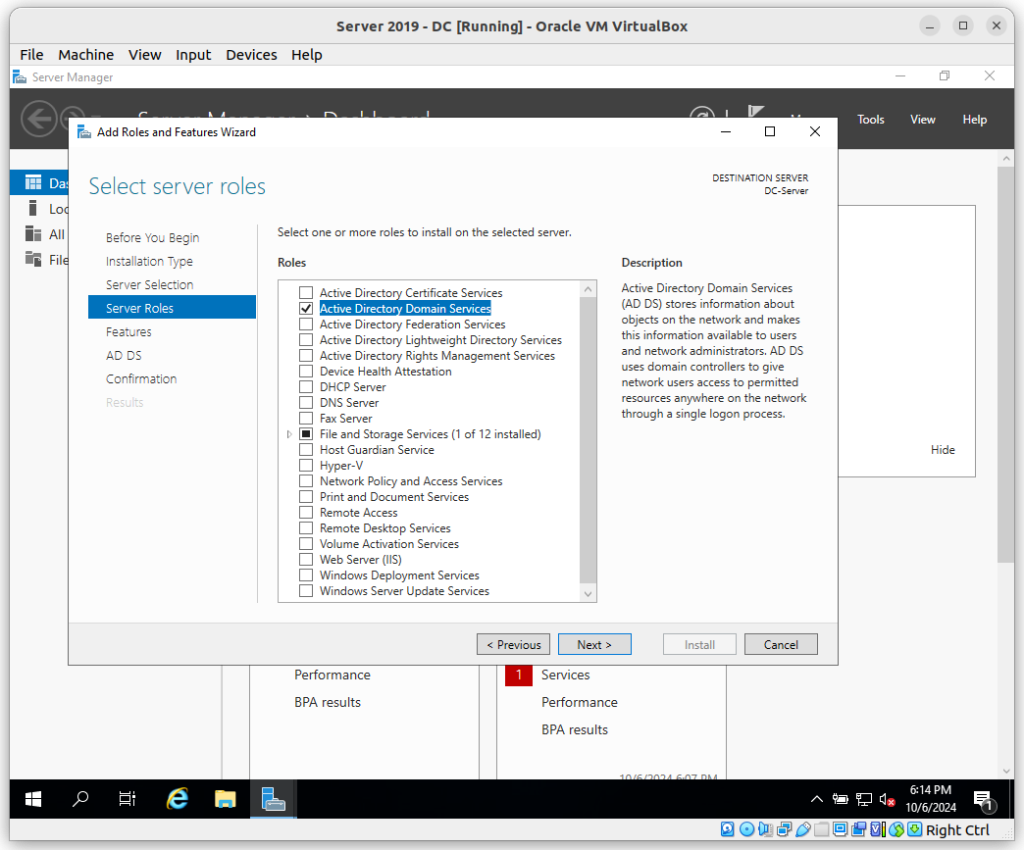
– The Add Roles and Features Wizard will open. Click Next until you reach the Server Roles page.
– Check the box next to Active Directory Domain Services (AD DS) and click Next through to Install
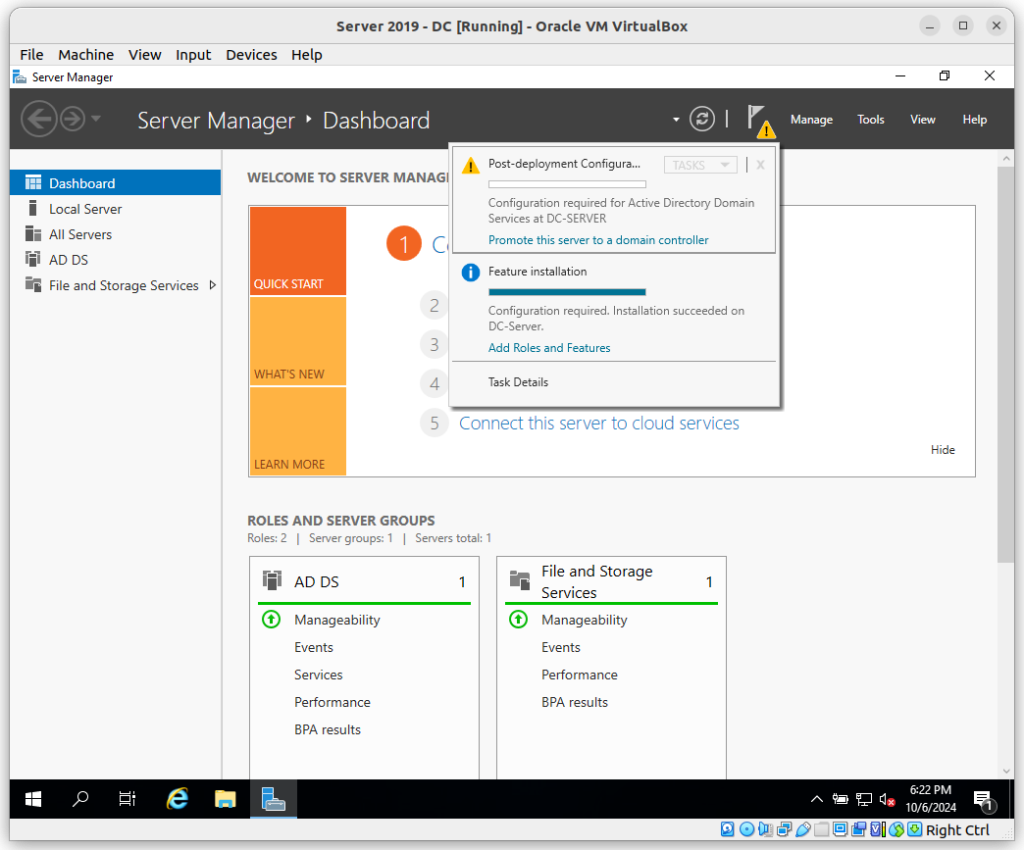
– Once the role is installed, click the yellow notification flag in the top right corner of the Server Dashboard.
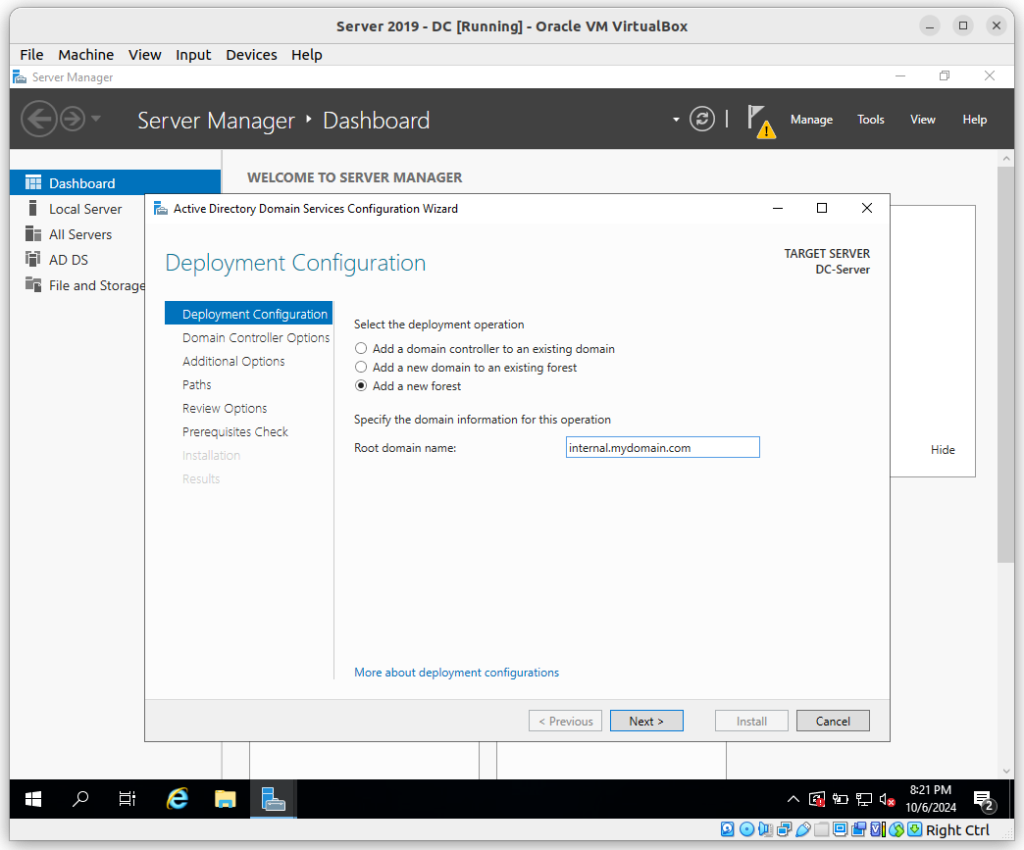
– Select Promote this server to a domain controller.
– Select Add New Forest
– Let’s set the domain. For this lab I will be using internal.mydomain.com
– Set a password and click Next through the remaining prompts to install.
Create a Dedicated Admin Account
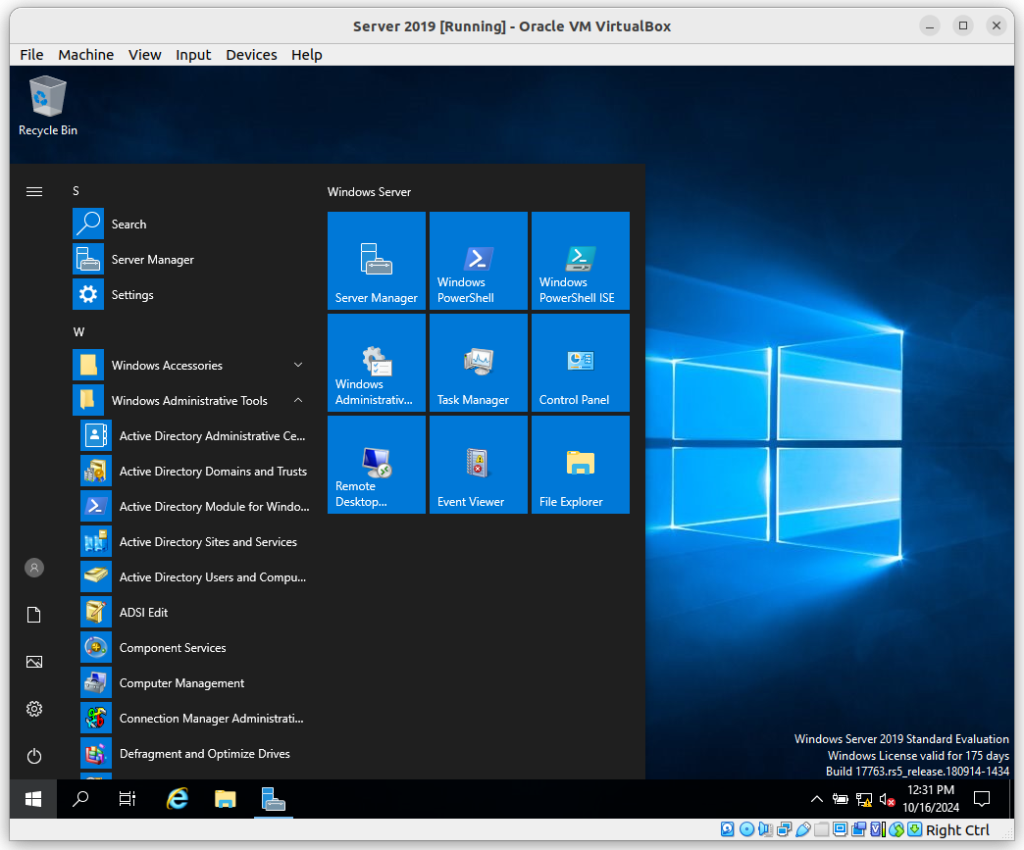
– Click Start and Open Windows Administrative Tools > Active Directory Users and Computers.
– Expand your domain (internal.mydomain.com), right-click, and create a new Organizational Unit (OU).
– I am going to name this organizational unit _ADMINS

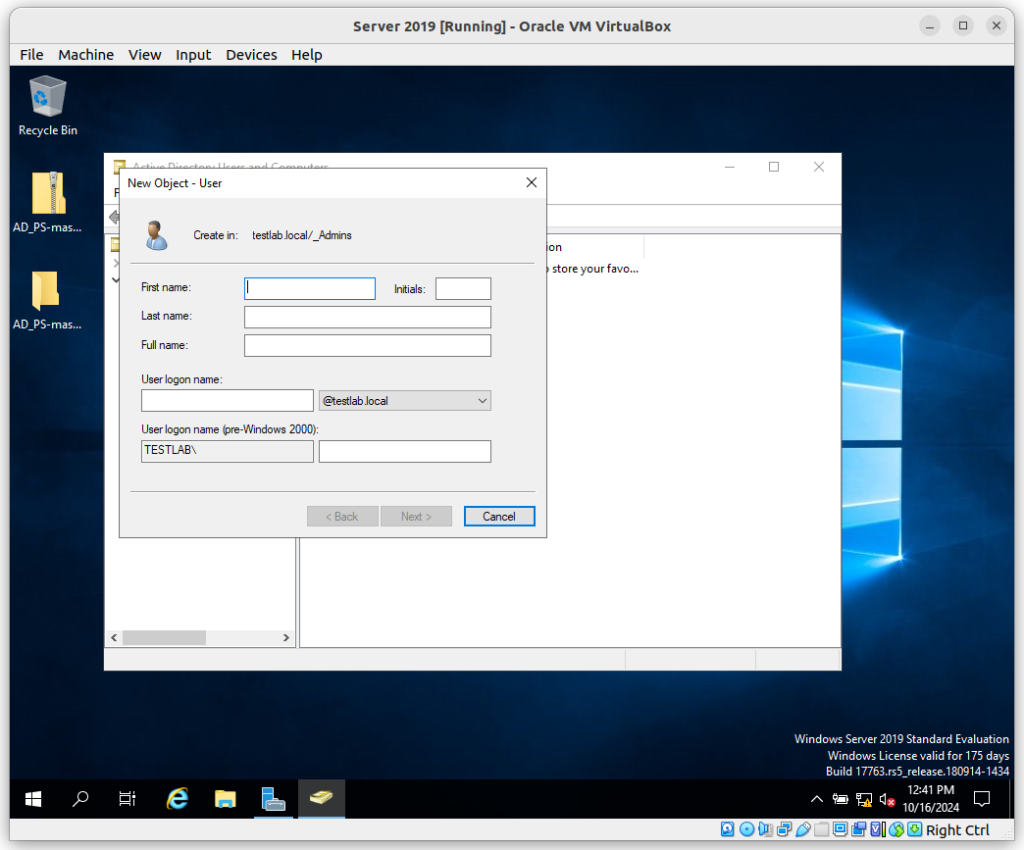
– Next right-click the new organizational unit and select New > User.
– Fill in the details (e.g., your name).
– Set a username like using an a- followed by your first initial and last name. Create a password.
– Uncheck Password never expires and finish.
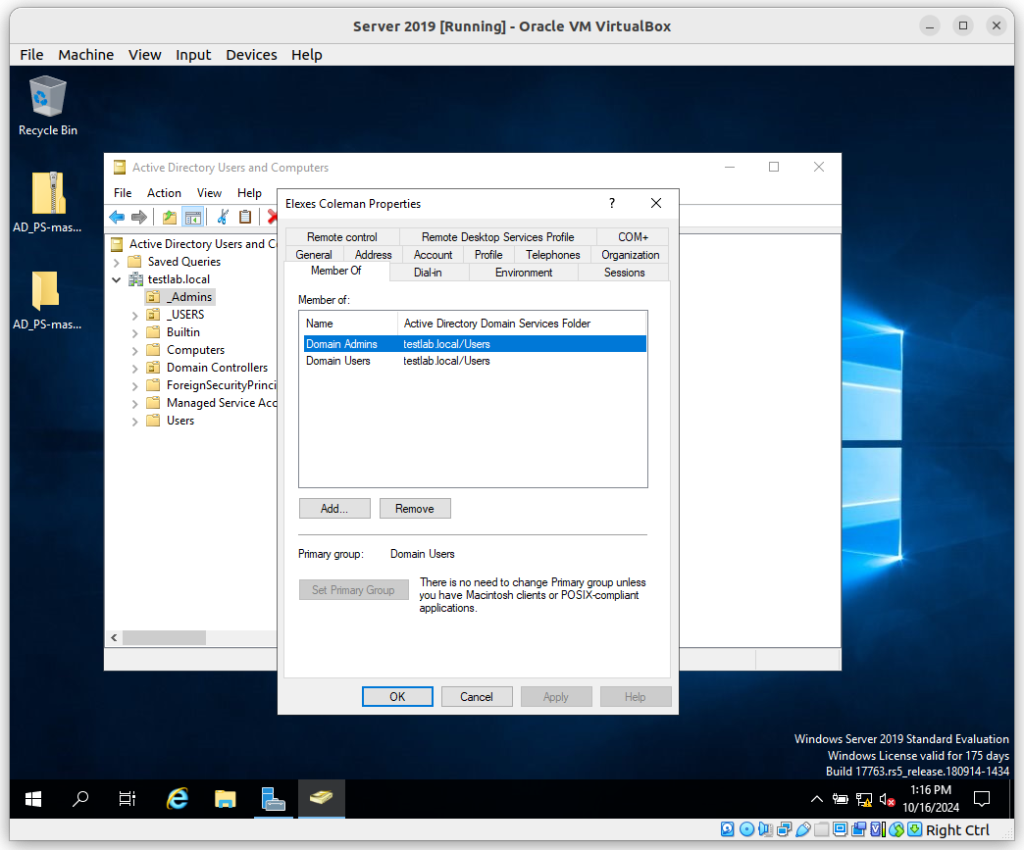
– Right-click your new user account, go to Properties, and under Member Of, add Domain Admins.
– Apply the changes, sign out, and log back in with your new admin account.
We are now going to Install Remote Access Services (RAS) with NAT – allowing our internal network to access the internet.
– In Server Manager, click Add Roles and Features.
– Under Roles, select Remote Access and click Next.
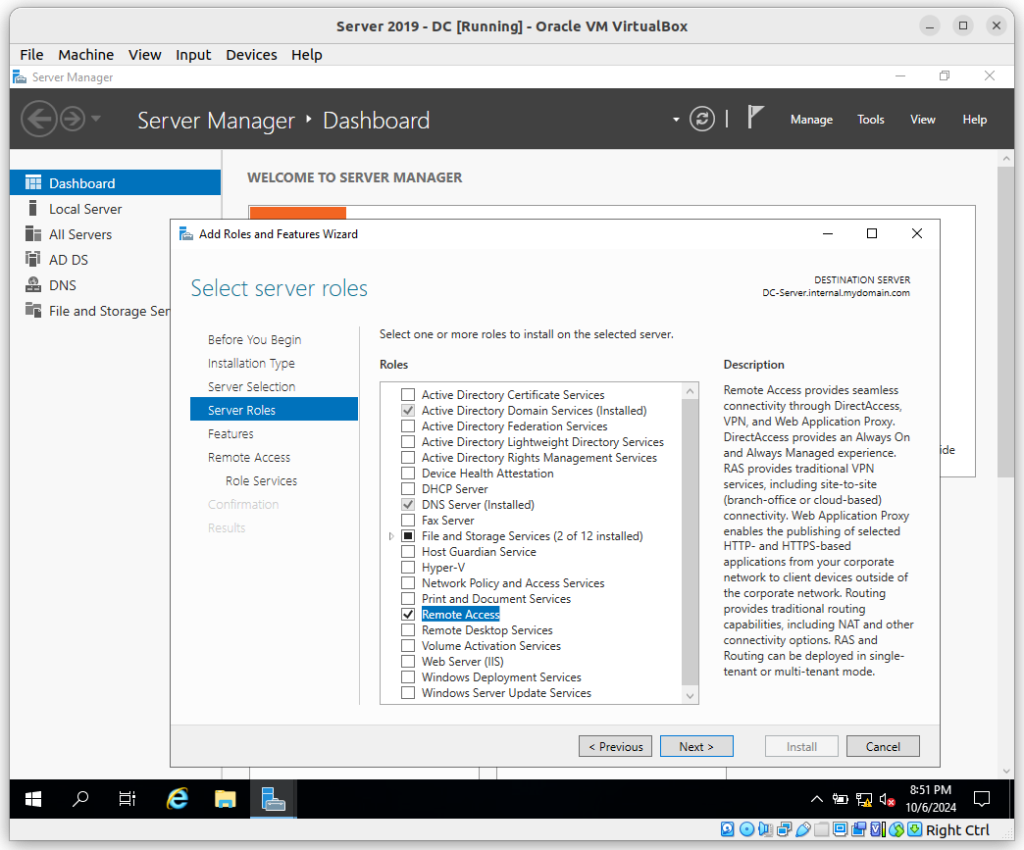
– On the following screen check Routing, then click Next through to Install.
– Once installed, go to Tools > Routing and Remote Access.
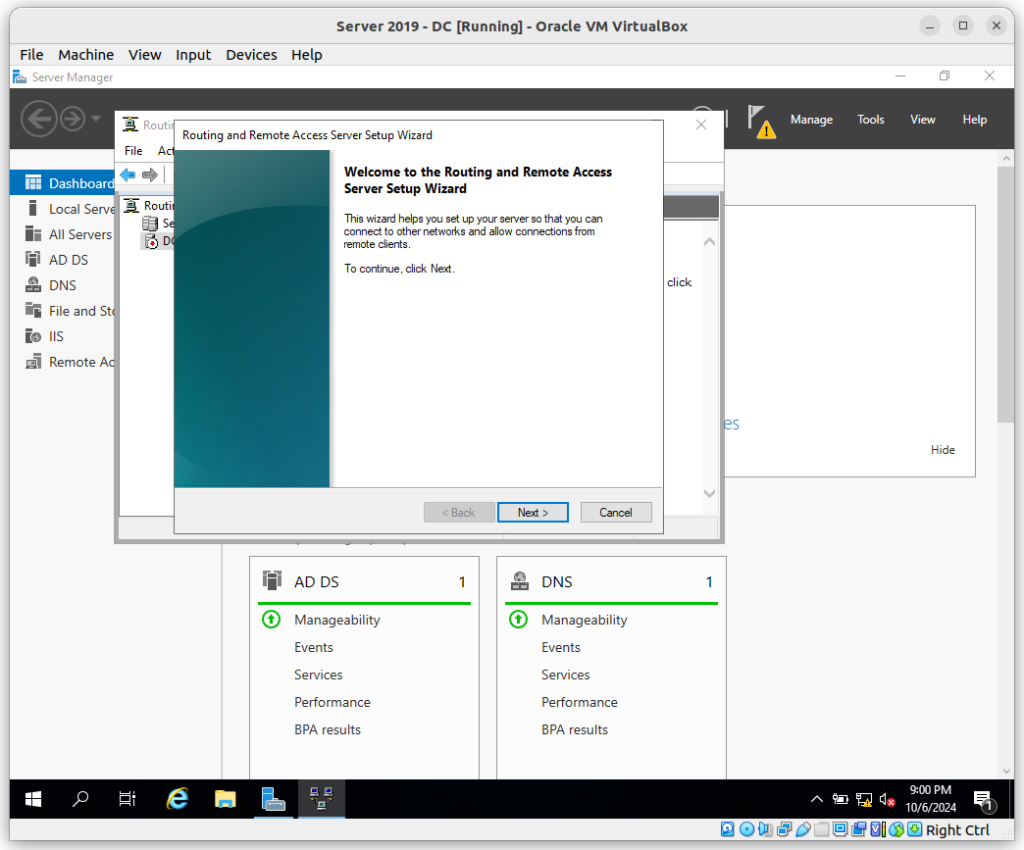
– Select Configure and Enable Routing and Remote Access.
– Go ahead and choose NAT and restart the service when prompted.
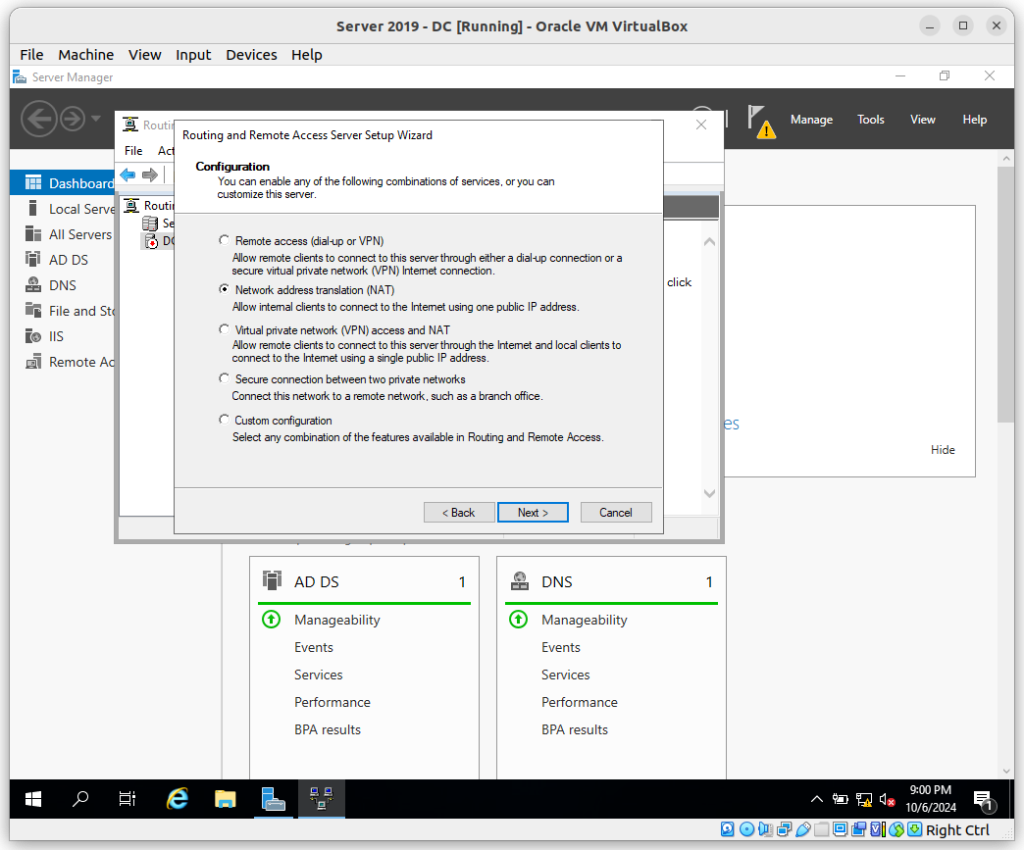
– Within the configuration wizard:
– Choose Use this public interface and select your internet adapter.
– Now just want to click Next to Finish.
Now that we have the RAS configured we are going to set up our DHCP server to automatically assign IP addresses to devices on our network.
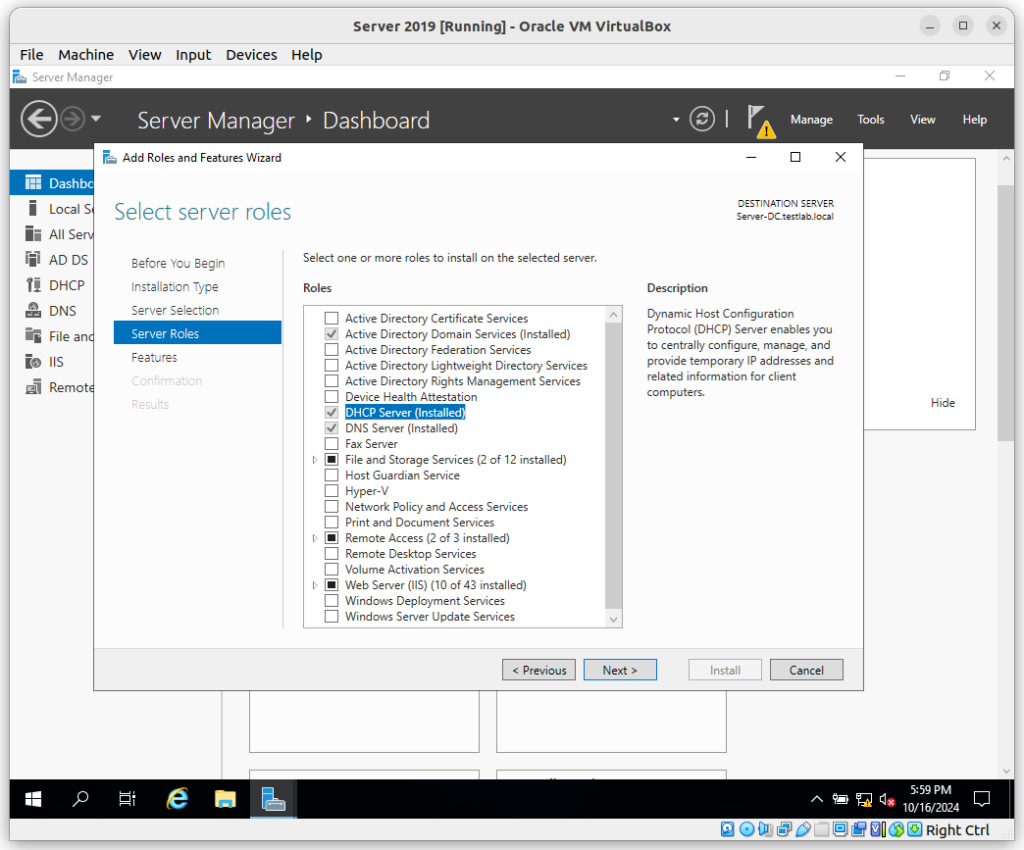
– We are again going to go into our Server Manager and click Add Roles and Features.
– Next we will select DHCP Server and follow the prompts through to Install.
– With our DHCP Server now installed we are going head back to Tools in Server Manager and select DHCP.
– Next we want to right-click IPv4 and choose New Scope.
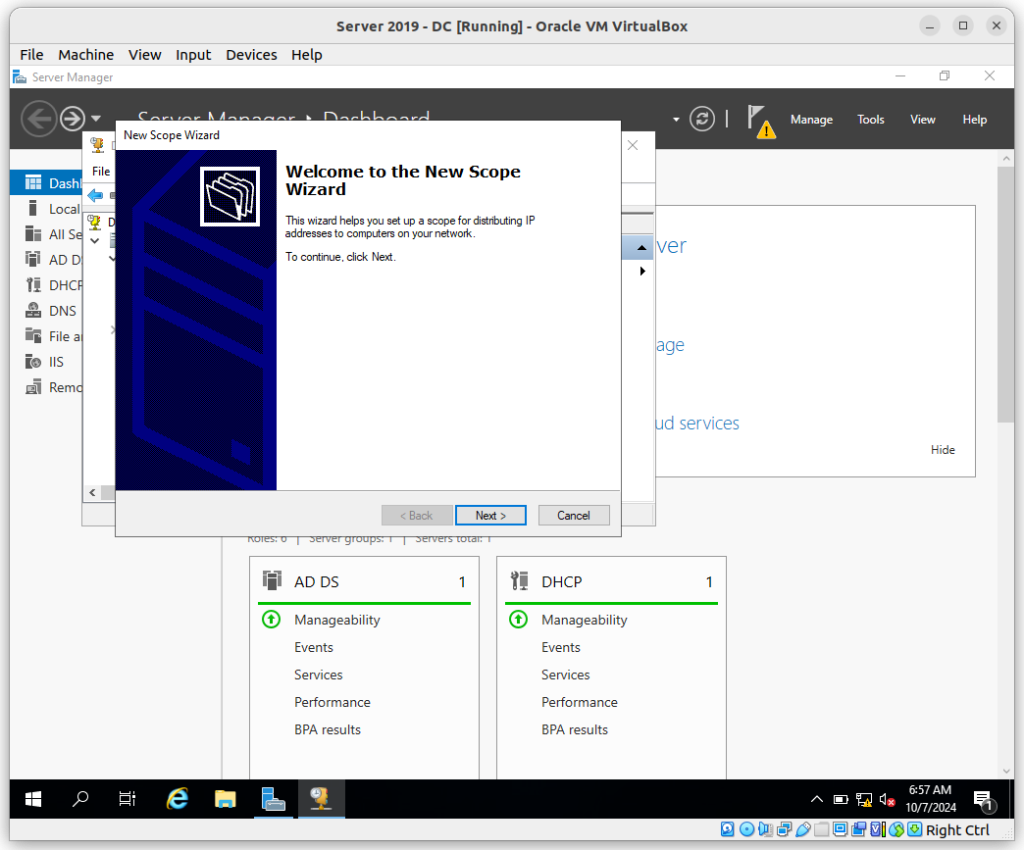
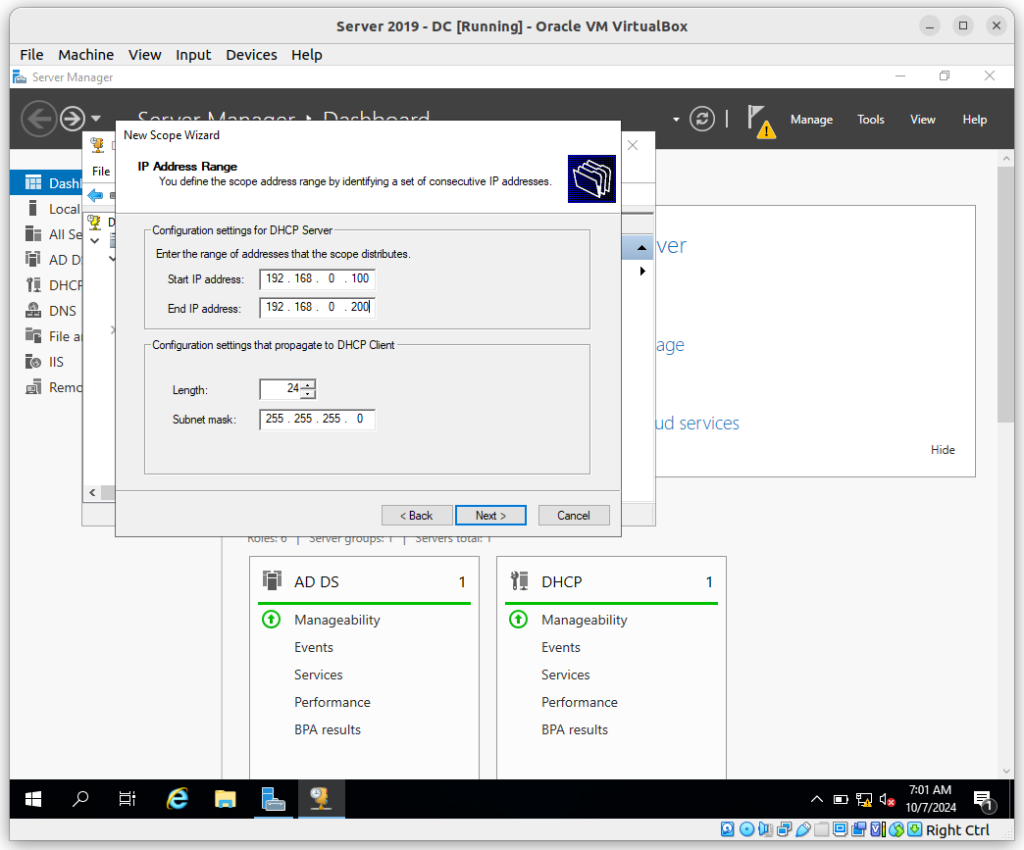
– On the next screen of the Scope Wizard let’s name the scope, and set the IP range.
**For this lab we are going to use 192.168.0.100 to 192.168.0.200 and finally we will use subnet mask 255.255.255.0.
– Skip exclusions and use the default lease time (8 days) for this lab environment.
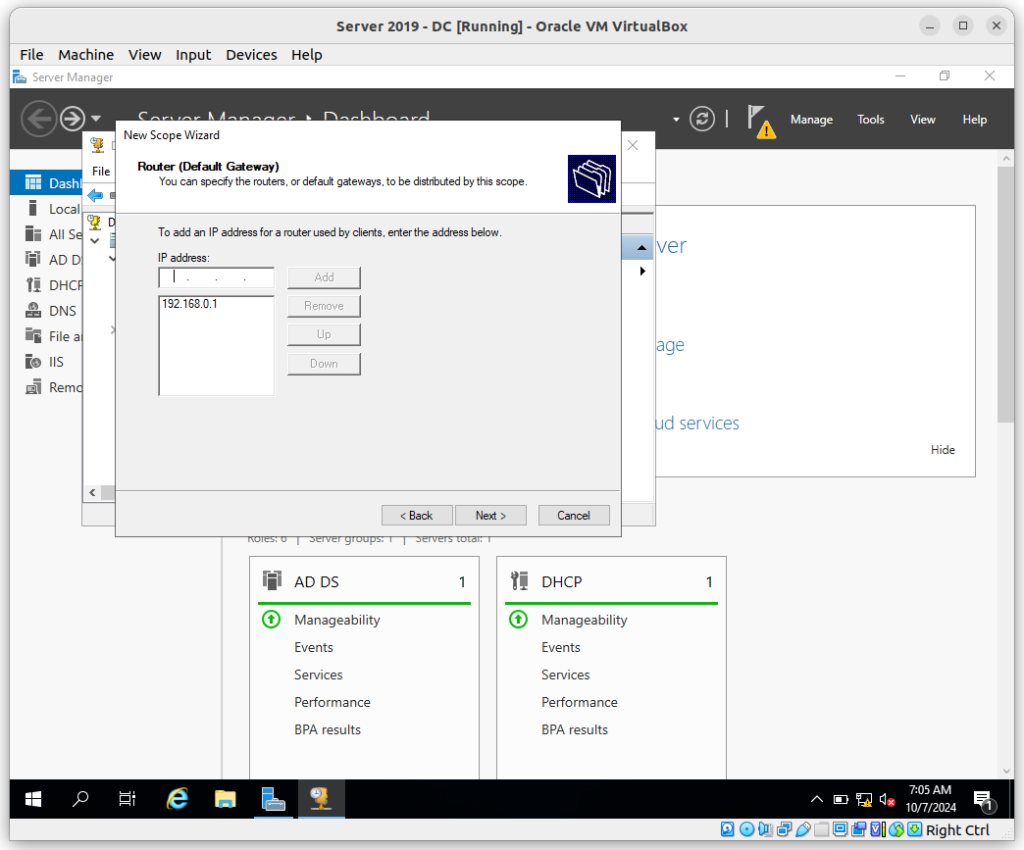
– On the following screen select “Yes” to configure the DHCP options.
– For this lab we are going to Add 192.168.0.1 as the router (gateway).
– From here we are going to continue following the prompts through the domain settings and Finish.
– Now right-click IPv4 and select Refresh.
**Next, right-click the server, choose Authorize, and refresh again. There should now be green checkmarks next to IPv4 and IPv6.
Part 3: Final Configuration for Active Directory and Windows 10 VM Setup
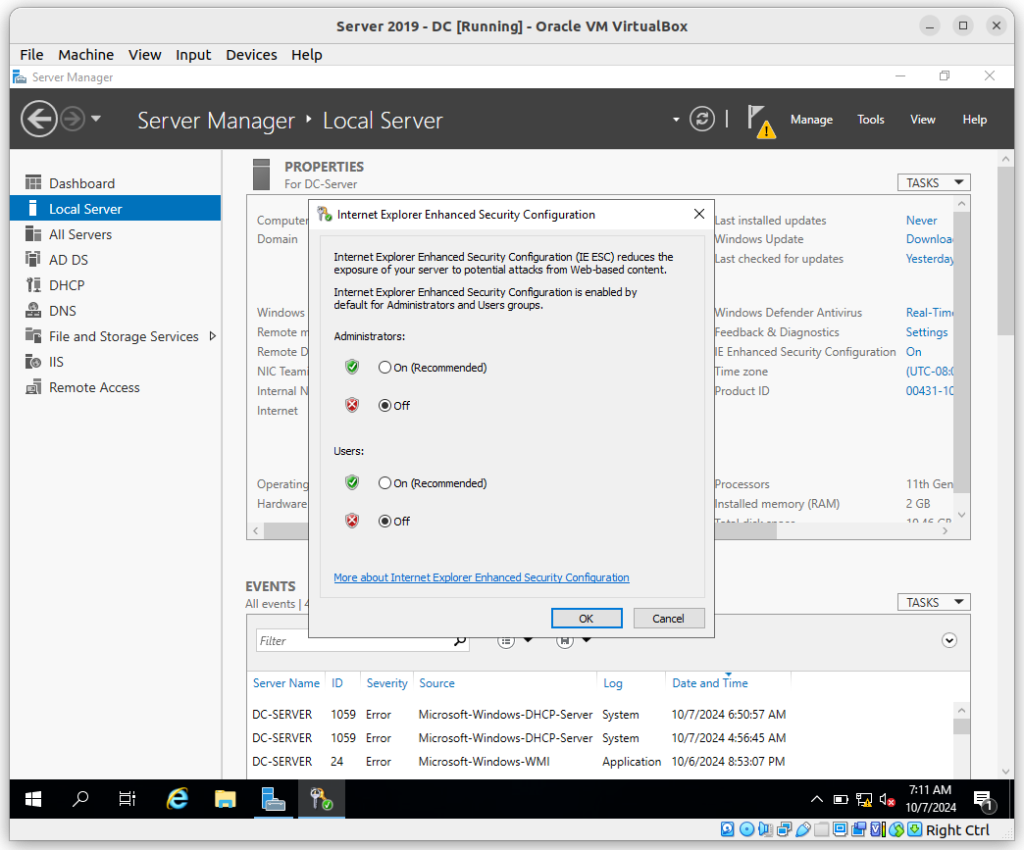
First we are going to configure Local Server Settings by disabling Internet Explorer Enhanced Security to eliminate browsing restrictions.
– We are now going to go back to the Server Manager.
– Scroll down to click on the Local Server.
– Under IE Enhanced Security Configuration, click and turn it off for both admins and users.
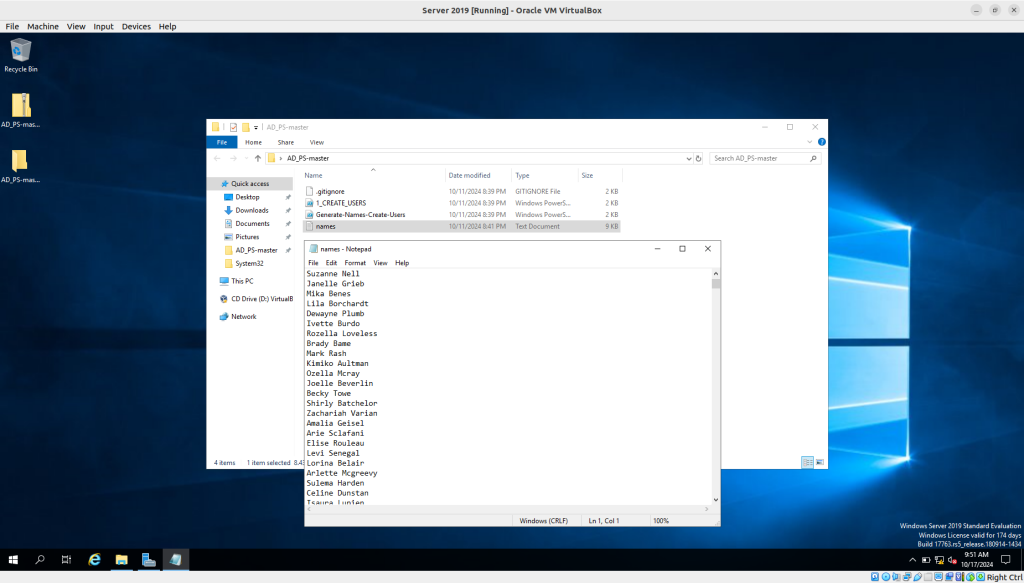
Next we are going to create users with a PowerShell Script allowing us to add multiple users quickly to Active Directory.
– First we are going to open Internet Explorer, and paste the script link into the search bar.
**https://github.com/ElexesC/AD_PS/archive/refs/heads/master.zip
– Next go ahead and download the file. Save it to your desktop..
– Extract the script to the desktop.
– Next open the extracted folder, edit the names list, and add your name to the top. Save the file.
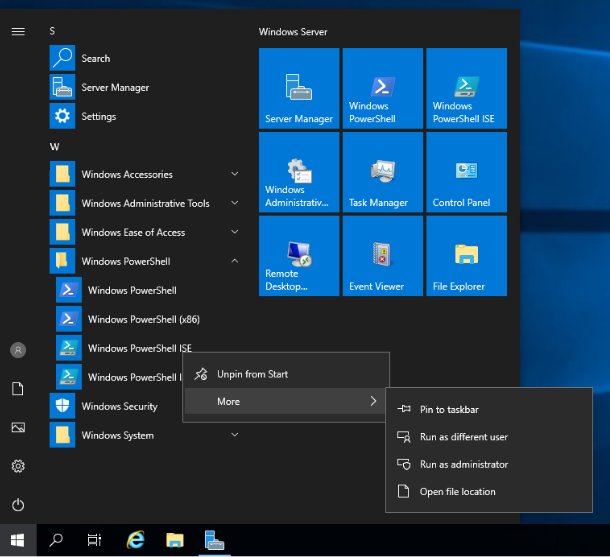
Now let’s open Start, search for Windows PowerShell ISE, right-click and choose Run as administrator.
– Next in PowerShell, go to File > Open, navigate to the folder on your desktop, and select the script.

– To allow script execution, run the following command in PowerShell:
- Set-ExecutionPolicy Unrestricted
– You can go ahead and select “Yes to All”
– Navigate to the script’s directory by running the following command in PowerShell:
- cd C:\Users\a-Username\Desktop\AD_PS
– Next you want to Play the script.
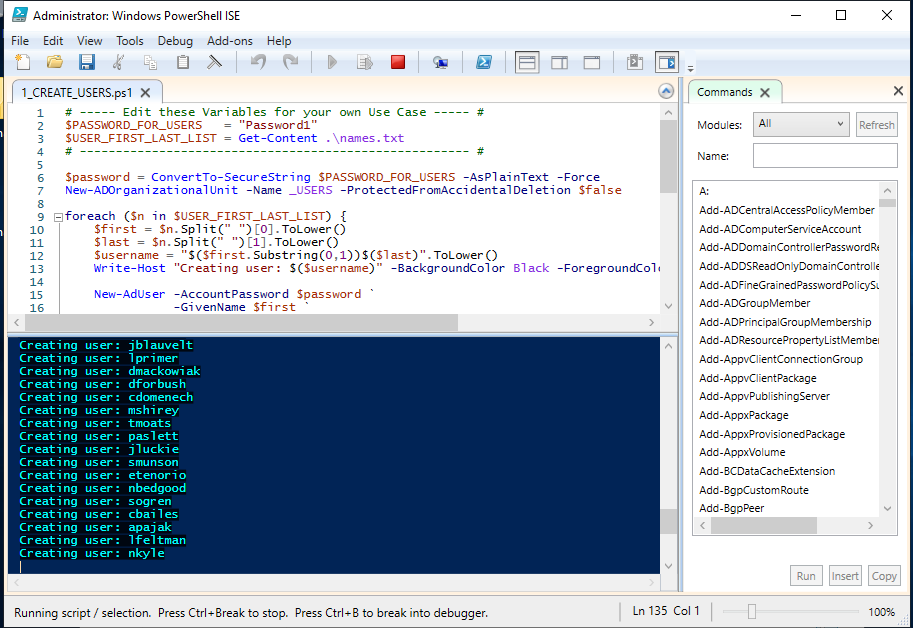
– When you check back in Active Directory Users and Computers, you should see a new Users folder containing all the newly created users.
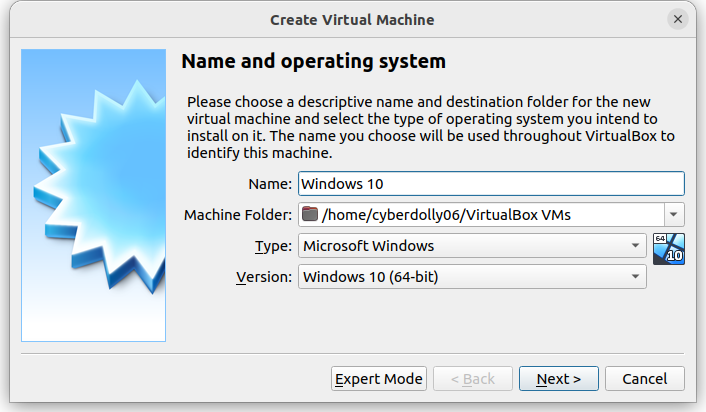
Next we are going to create a Windows 10 Virtual Machine (VM), which will act as the client. In Virtualbox click New to get started. Here’s what we need to configure:
– Name: Windows 10
– Type: Microsoft Windows
– Version: Windows 10 (64-bit)
– On the next screen we are going to select the amount of memory for our machine. We will go will 2048 MB.
– Type: Microsoft Windows
– Version: Windows 10 (64-bit)
– Continue to follow the prompts to Finish.
– Once the VM is created, go to Settings.
– Advanced, set Clipboard to Bidirectional.
– Once the VM is created, go to Settings.
– Select Advanced, set Clipboard to Bidirectional.
– Now under System, allocate 1-2 CPUs.
To ensure the virtual machines can communicate, set up an internal network. In VirtualBox:
– Right-click on your Windows 10 virtual machine and select Settings.
– Navigate to the Network tab on the left side of the window.
Configure the Network Adapter:
– Under the Adapter 1 tab, ensure the checkbox for Enable Network Adapter is selected.
– In the Attached to dropdown, choose Internal Network. This will isolate the virtual machines from your physical network and allow them to communicate with each other only within the VM.
– You can leave the Name field as the default (e.g., intnet), or create a custom name if you’d like to differentiate between multiple internal networks.
– Click OK to save these changes.

Test Network Connectivity:
– After setting up the internal network, start both the Windows Server 2019 and Windows 10 virtual machines.
– Once both VMs are running, open Command Prompt on the Windows 10 machine and run a ping test to check the connection with the Windows Server 2019 VM:
- Open Command Prompt (type
cmdin the search bar). - Type
ping <IP address of Windows Server 2019 VM>and press Enter.
- Open Command Prompt (type
– You should receive successful ping replies, confirming that the machines are connected via the internal network.
We are now going to double-click the Windows 10 VM to start it.
– Choose the option to Add an ISO file.
– Select the Windows 10 ISO and click Choose.
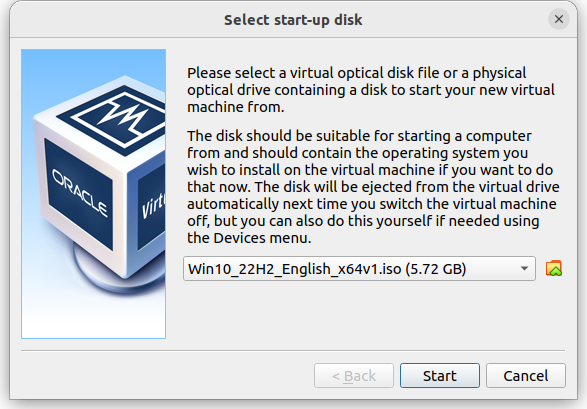
Next in the Windows 10 startup screen, select your language and click Install Now.
– Go ahead and select Choose I don’t have a product key.
– Select Windows 10 Pro to ensure it can join the domain.
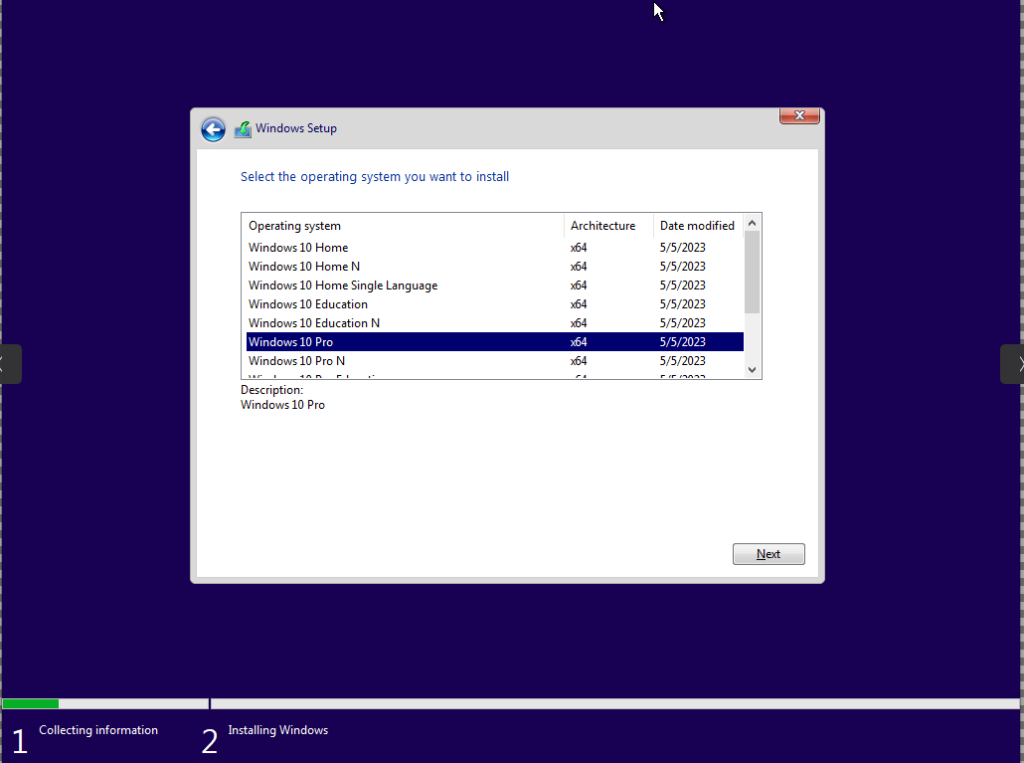
– Now you’re going to accept the license terms, choose Custom, and click Next to start the installation.
– After installation, configure your region and keyboard layout.
– Next we will choose Home or Personal Use and select Offline Account to avoid creating a Microsoft account.
– Opt for Limited Experience and continue.
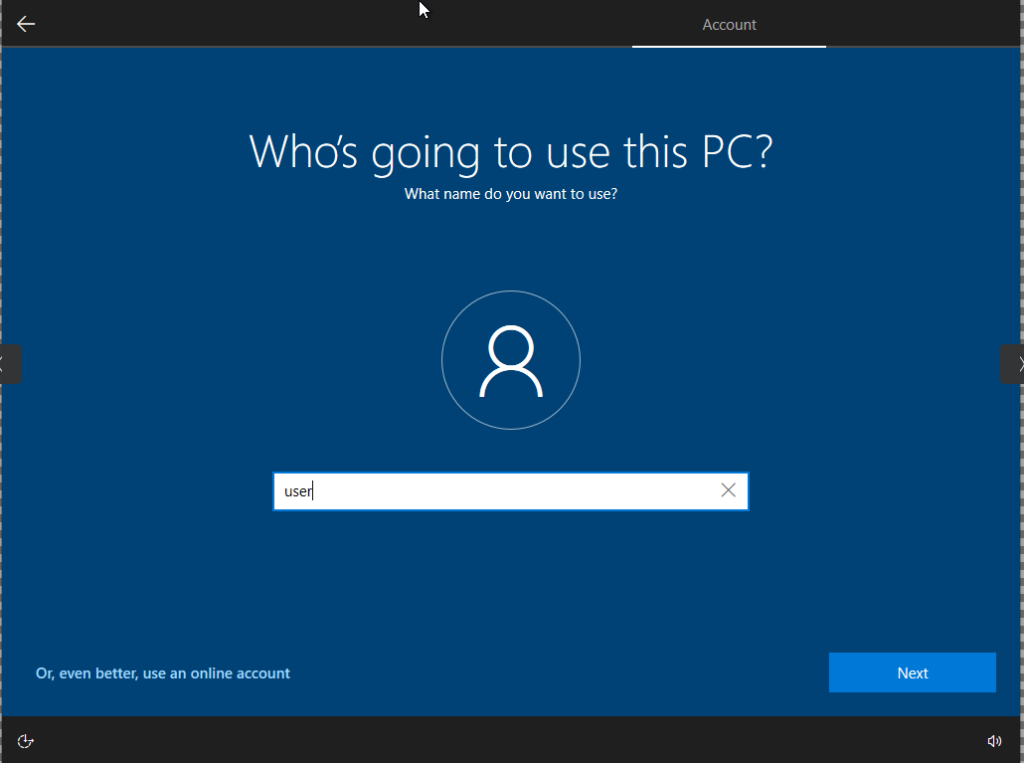
– Next we are going to create a new user account (you can skip through the password page for now as we don’t really need it here.)
– We will now configure our privacy settings (I decided to turn them off) and hit Accept.
– Skip Cortana by selecting Not Now.

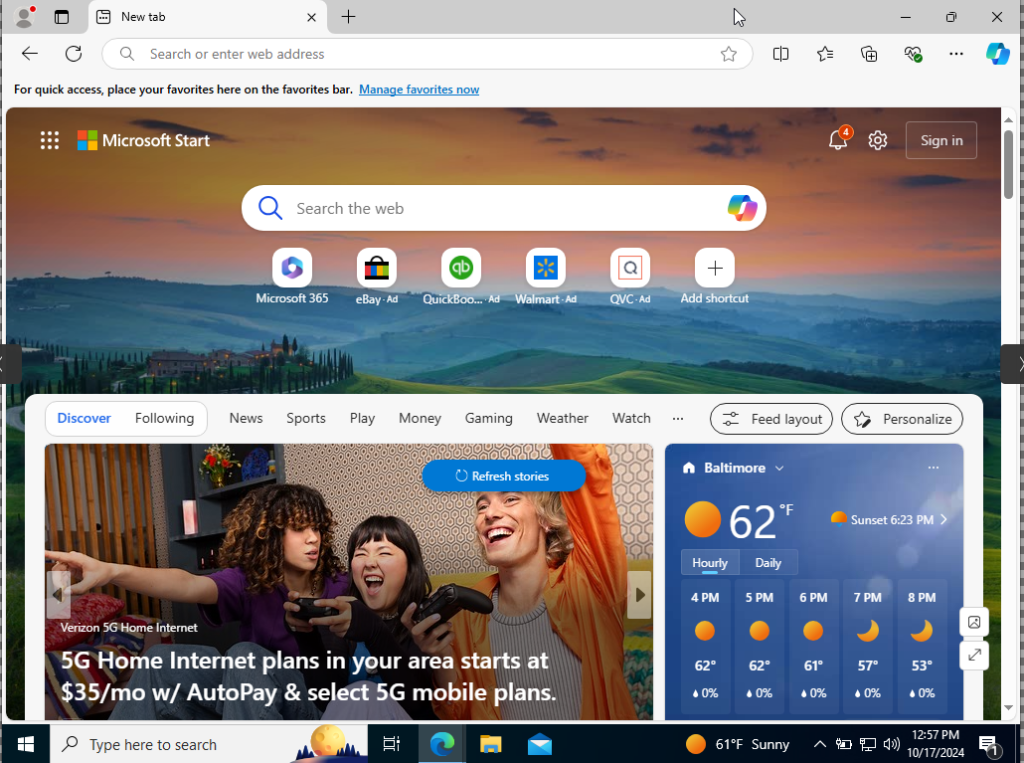
From here we are going tot verify internet access on Windows 10.
To complete the setup, we’ll rename the Windows 10 VM and join it to the domain.
– First we are going to click Start > Settings > System > About.
– From here scroll down to Rename this PC (advanced).
– Click Change here and set the name to Client1.
– Under Member of, select Domain and enter testlab.local
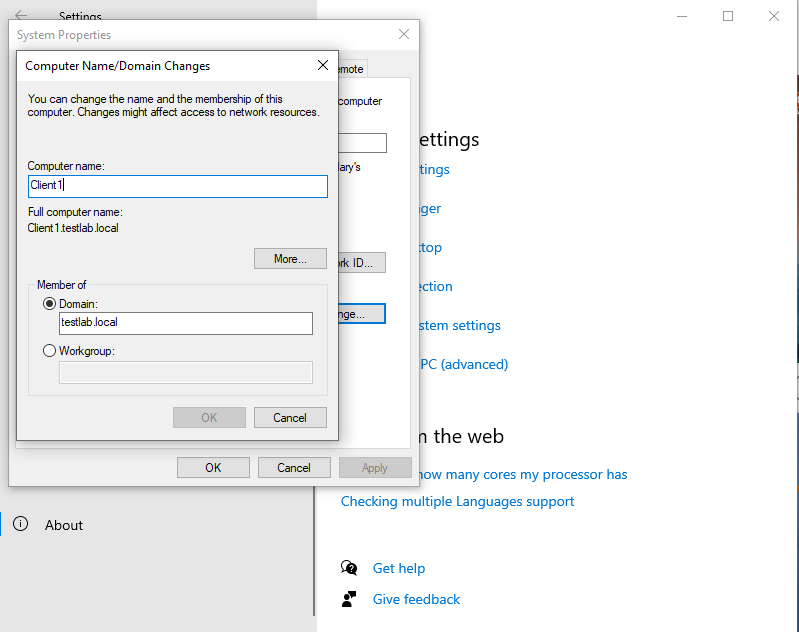
– Next we want to enter the domain admin credentials to authorize the change.
– Follow the prompts to restart the machine.
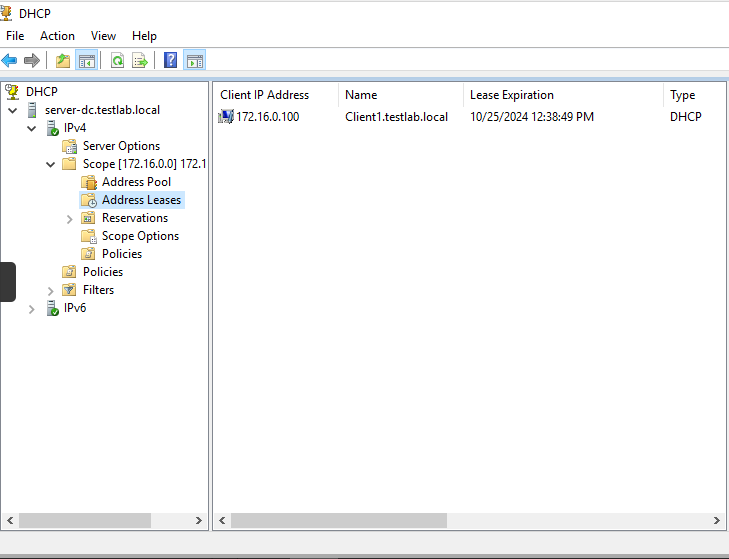
Lastly, we’ll check the DHCP server to ensure it’s assigning IP addresses to clients.
– Let’s go back over to our Server. In Server Manager open DHCP.
– Click on the Scope and check the Address Leases to verify that an IP has been assigned to Client1.
We can now login to any of the accounts that we created with the PowerShell script with no concerns.
Everything’s up and running! Now it’s time to explore and get some hands-on experience with your lab.